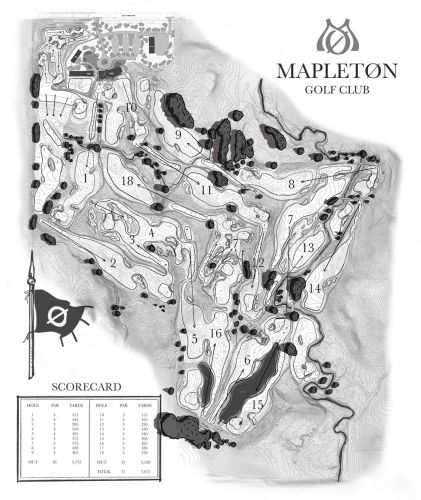
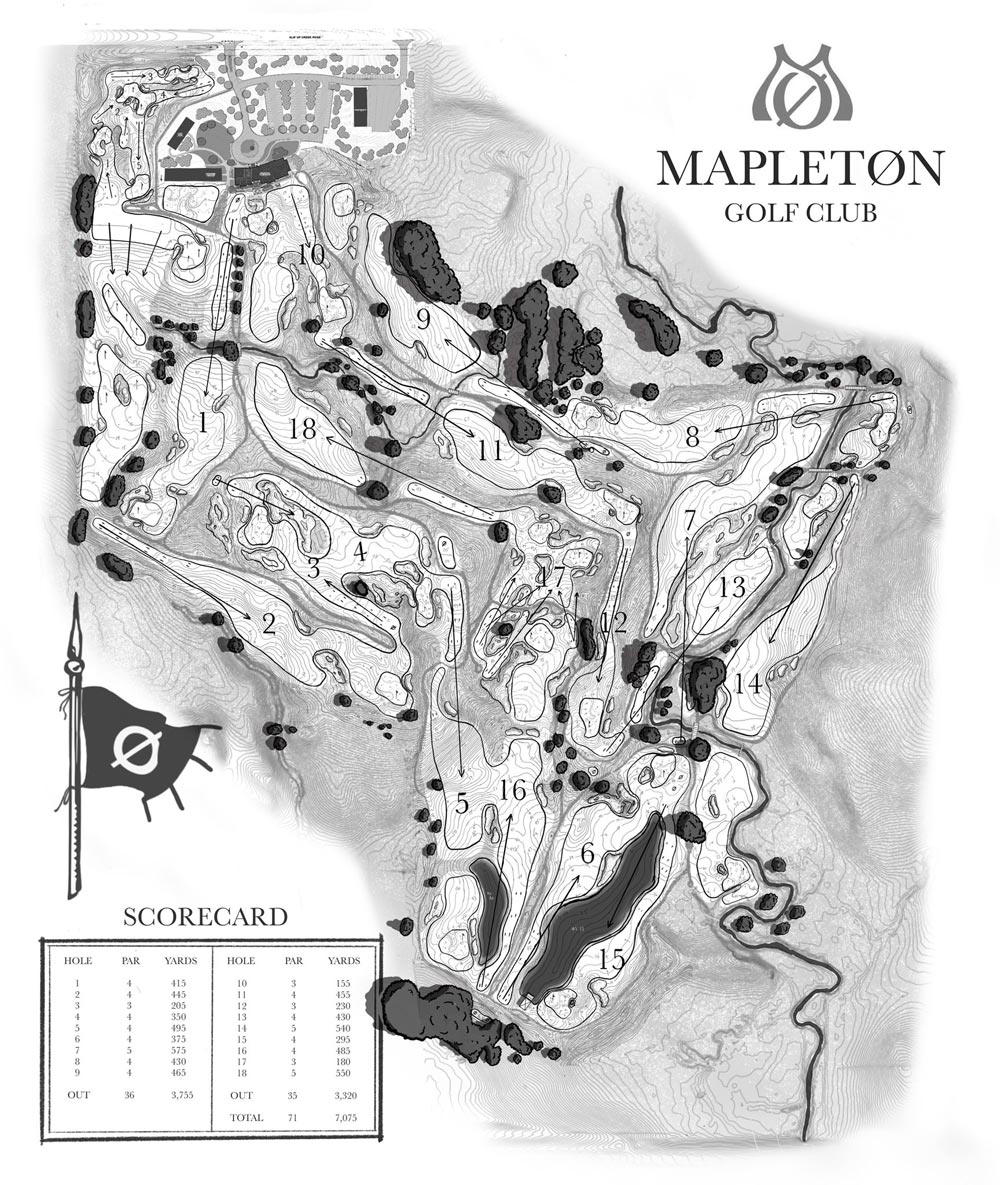
Click to Enlarge:

Hole by Hole

Hole 1
The opening hole at Mapleton is a mid length par 4 meant to be a welcoming start but you will need to pay attention as there is still some difficult spots to avoid. The tee shot plays across a natural creek bed and through a comfortable width shoot of existing trees to a wide fairway. The right side is the ideal line but you will need to avoid two sets of bunkers on the right. The green is slightly uphill to a horizon line green with fairly deep bunkers on the left. To the right of the green is a shortly mowed grass area that will give many options on how to achieve an up and down, a common theme of what is to come throughout your round.
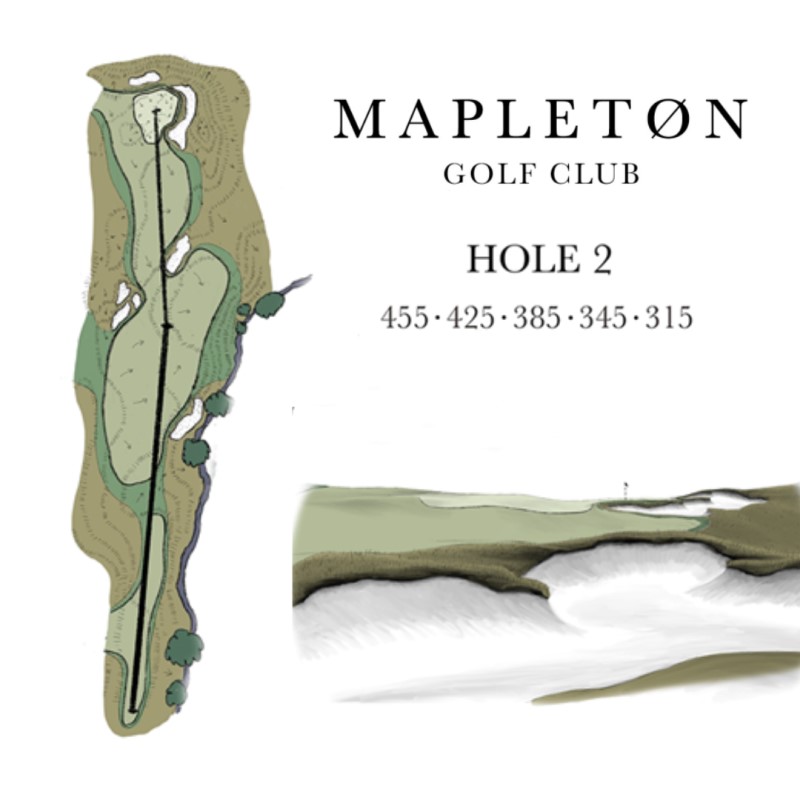
Hole 2
The second hole is a longer par 4 with spectacular views. Dogleg left usually suits a right-to-left ball flight. Not here. Both shots are best suited for left-to-right. The ideal tee shot holds close to the bunkers down the left side. However, if your tee shot bounds right, don't worry. The green slopes left to right, helping balls reach the tucked pins behind the right bunker. The left side of the green is protected by a slight rise, deflecting shots that lack conviction. Another horizon-line green affects depth perception and creates a wonderful backdrop for photos.
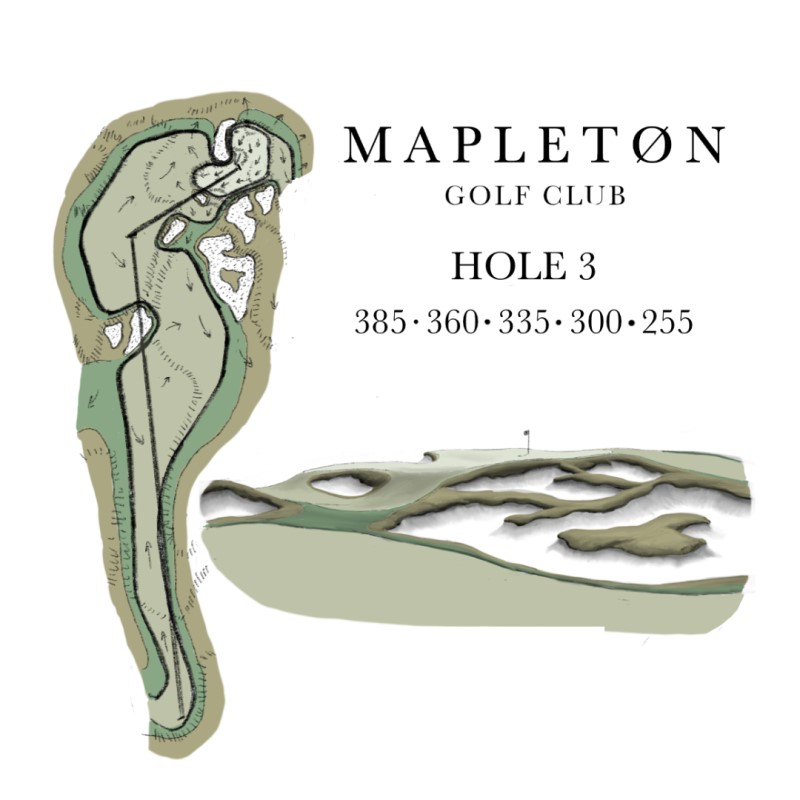
Hole 3
No. 3 is a shorter par 4 with interesting options. Hole location helps dictate decisions off the tee. With a front pin, the best option is driver up the left side. Back pin? It's better to hit a shorter club right of the two small fairway bunkers. The fun ramps up on the approach as you play the angles into a skinny green. Thought and execution is rewarded with a birdie putt.
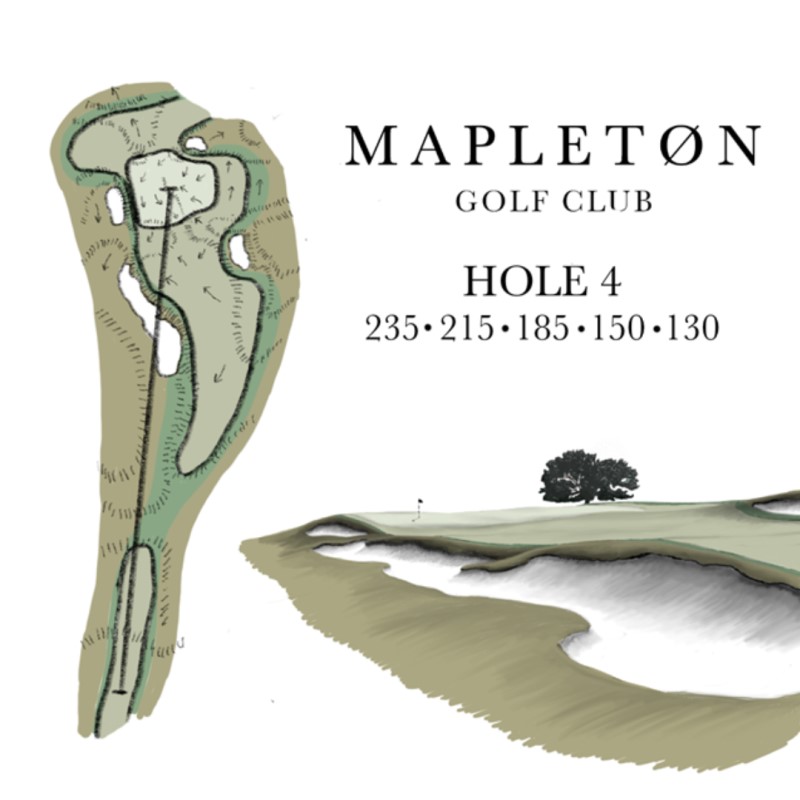
Hole 4
This downhill par 3 is the longest of the short holes but also the friendliest target. There's no need to fly it the full distance. The clever player can aim away from the left bunkers and use the natural slopes short and right to feed the ball onto the large green.
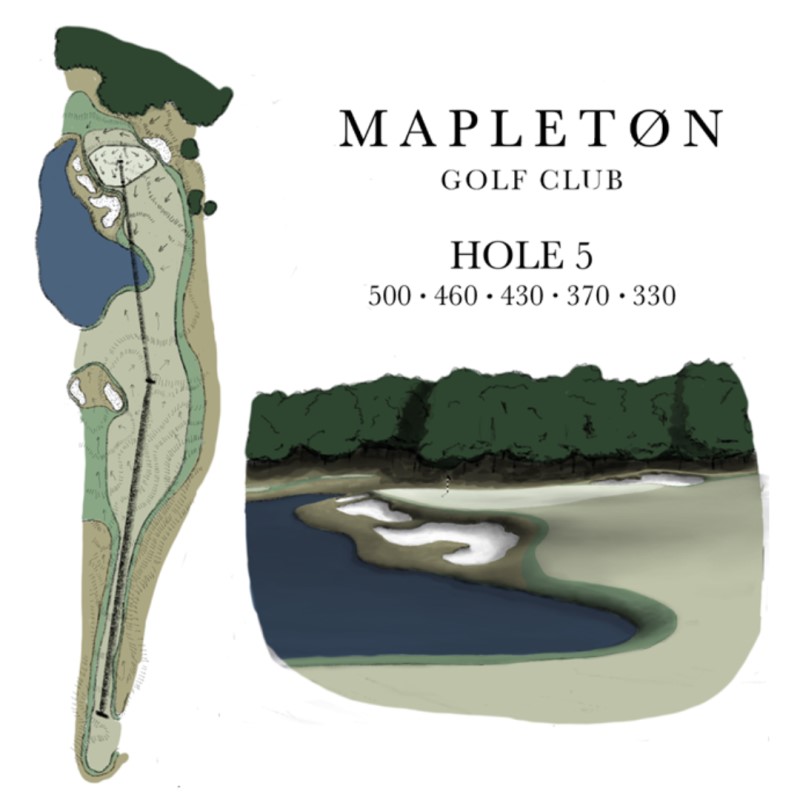
Hole 5
This long par 4 is easy on the eyes but it will be hard on scorecards. The tee shot drops 50 feet to a large fairway, setting up an approach to a receptive green framed by a pond and dense trees. It's a wonderful setting, but one of Mapletøn's best par 4s demands two solid shots..

Hole 6
The 6th hole veers northeastward and nestles in a tranquil location at the lowest point of the property. To the right, a sizable lake meanders alongside the fairway, complemented by a substantial bunker that ascends steeply from the right, cutting into the hillside. This combination defines the primary strategic elements of this hole.
A tee shot aimed away from the water will provide a slightly obstructed view of the green, courtesy of the bunker. Nevertheless, the advantage of this approach is that it offers the most favorable access to the green.
Conversely, those opting for a more aggressive line along the water's edge will be rewarded with a magnificent view of the green, which is beautifully framed by two towering cottonwood trees. This angle allows for a shorter iron shot, but it requires skill to navigate the bunker situated short and to the right of the green.
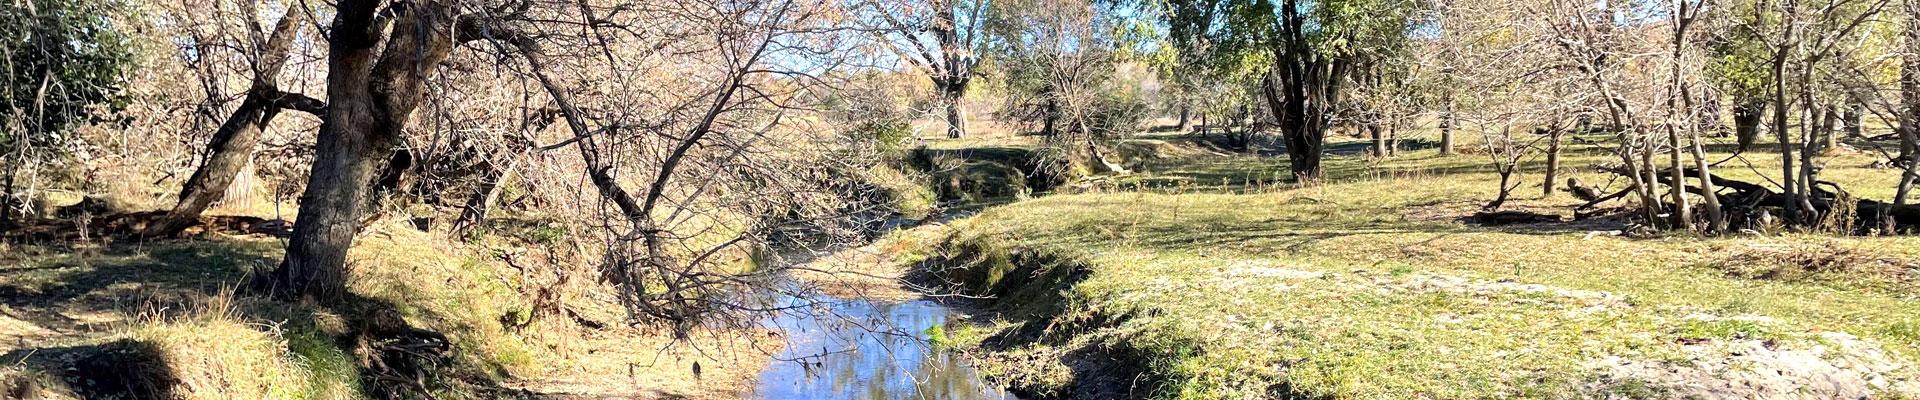
Upon reaching the elevated green, players will be treated to their initial glimpse of Slip Up Creek, a prominent feature that will come into play on three subsequent holes in the round.

Hole 7
The seventh hole at Mapleton beautifully showcases the natural features of its landscape. A majestic 50-foot high hill graces the left side of the tee shot, subtly guiding the fairway to the right. On the right, a cluster of imposing trees obscures the view around the corner, shrouding the hole in mystery. A well-executed tee shot down the right side, skirting a sizable bunker and gently maneuvering around those trees, offers the optimal path for those aiming to reach the green in two strokes. Alternatively, playing it safe involves positioning the ball to the left, leveraging the hillside to redirect the ball and shorten the hole.
The second shot centers around Slip Up Creek, which flows diagonally from the left to the right, directly in front of the green. The second shot, and possibly the third if laying up is the choice, unfolds against the backdrop of a splendid green setting. It is framed by an impressively tall hillside, rising well above 100 feet, and adorned with mature trees and intriguing ridges that slope from right to left. The green itself is guarded by Slip Up Creek, bunkers on the front left, and a lone bunker on the back right, ready to catch aggressive approaches. Opting to bail out to the right may leave you in the fairway, but a fast front section of the green presents some intriguing challenges.

Hole 8
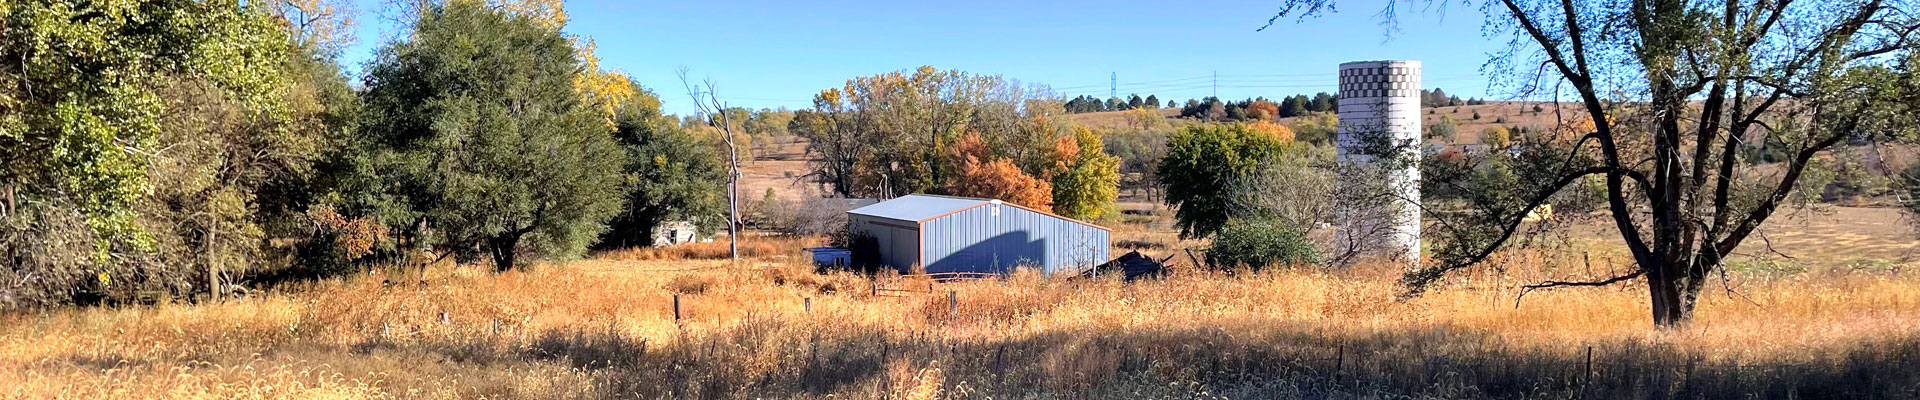
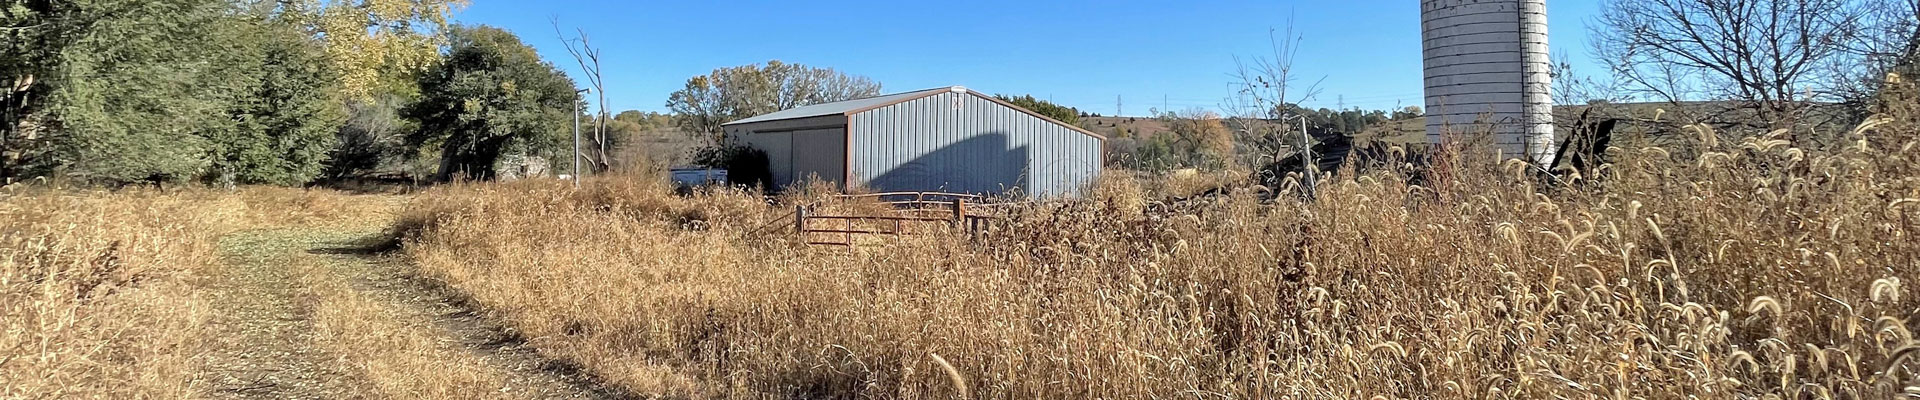
No. 8 is a shorter par 4 playing to the iconic tilting silo. A diagonal ridge defines the tee shot. Balls that carry the ridge run out and shorten the approach. A very deep bunker fronts the shallow green, so the smart miss is long where short grass makes recovery easier.
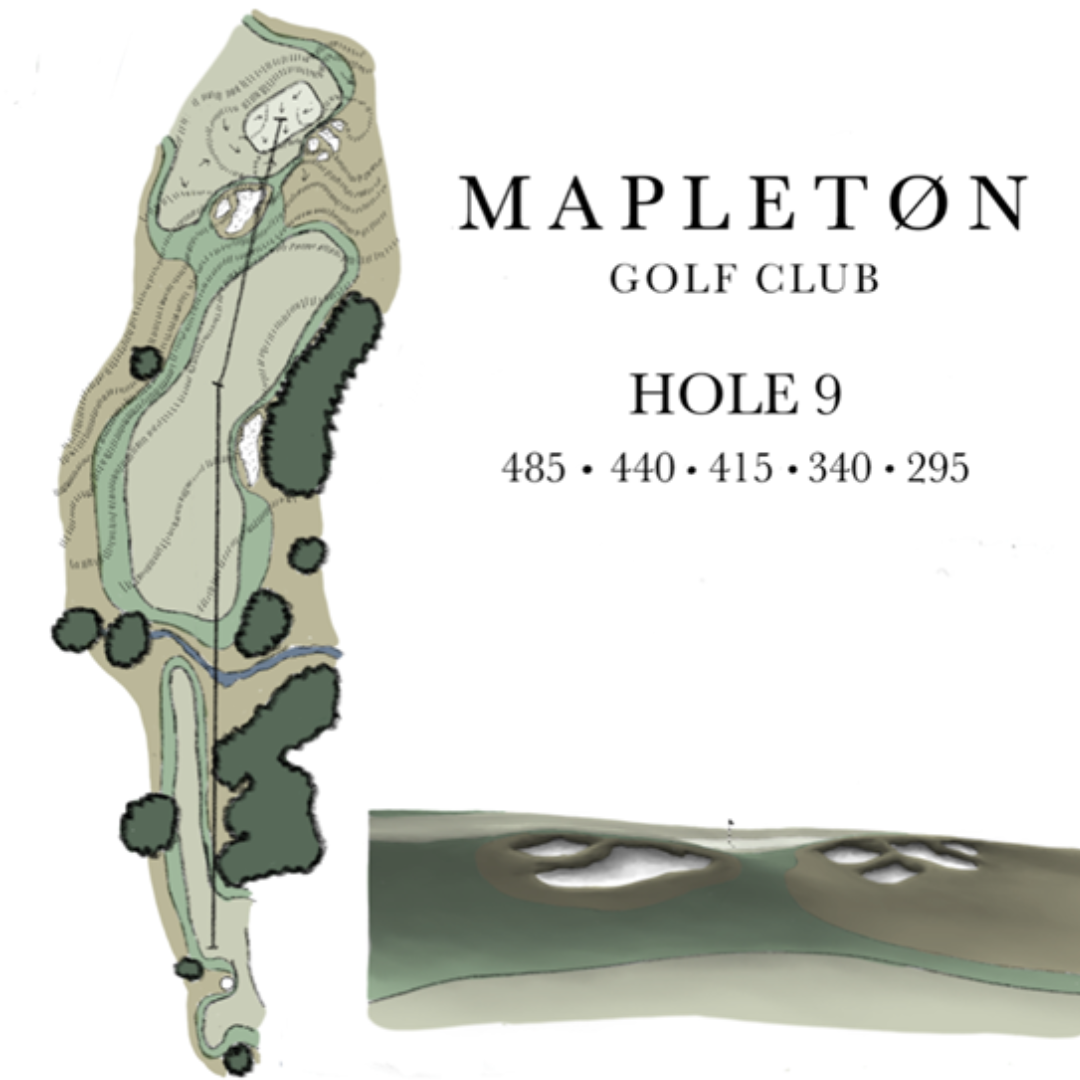
Hole 9
The front nine finishes with a strong par 4 back to the clubhouse, which stands elegantly behind the 9th green. The tee shot plays through a chute of mature trees into a hillside that pitches balls right, helping players get around the corner. The green, protected by bunkers short, sits atop a long incline in a large natural bowl. An approach left or long will kick toward the surface, slightly easing this intimidating hole.

Hole 10
The back nine begins with a scary proposition. This par 3 is the shortest on the course – and the green is Mapletøn's largest – but the surface is perched on a knoll with extremely deep bunkers short left and right. A uniquely shaped green features a deep swale creating two plateaus on either side. Adding to the challenge, you will be hitting the tee shot just a few steps from the back patio of the clubhouse, in full view of members and guests who will be eager to watch and heckle. No pressure!

Hole 11
Tee shots at the wonderfully natural 11th hole cross a stream, landing into a hillside that slopes hard from right to left. Any aggressive drive down the left side will challenge a large deciduous tree.
The approach plays to a plateau backed by rolling prairie in the distance – more than a mile away. An amazing view of old South Dakota. A deep left bunker influences strategy, grabbing errant irons but also funneling balls toward left pins.

Hole 12
From the 12th tee, you can absorb an amazing view of half the golf course. But the best look is right in front of you, a long par 3 along a natural ridge that finishes beside an existing grove of trees. Behind the green looks like the end of the world, enhancing the view -- and maybe your blood pressure. The putting surface slopes right to left, but don’t bail too far right. It leaves a dicey chip to a green running away.

Hole 13
The 13th hole is a challenging par 4, seamlessly blending into the natural beauty of the golf course. The tee shot weaves through a picturesque avenue of cottonwoods, following Slip Up Creek. The creek plays a prominent role, meandering left of the green, crossing the fairway between the tee shot and landing area, and tracing the right side towards the trees. The fairway, generously wide and bunker-free, offers strategic opportunities to tackle the intricate green complex. The green sits on a natural ledge, with the back three-quarters gracefully draped over, while the front quarter folds onto existing ground. Memorable and strategic, this hole becomes a post-round conversation piece at the 19th hole.

Hole 14
The 14th hole is a mid-length par 5 that will require courage and thought. The tee shot plays downhill along an escarpment that frames the left side of Slip Up Creek. A well hit drive will present an inspiring view of the fairway and green bookended by two large cottonwoods and a winding Slip Up Creek. The 2nd shot presents your next options for how to attack this hole. The layup over the creek is wide. Without courage, a shot played safely to the right can get blocked by the Cottonwoods and a small, raised bunker just right of the green. If you opt to go for the green in two, you will have to deal with the creek that cuts in front of the green and the bunker. The green lays counter to the fairway and is narrow with some roll offs on many of the edges. Care will be needed on every shot throughout this “birdieable” hole or good scores will quickly deteriorate.
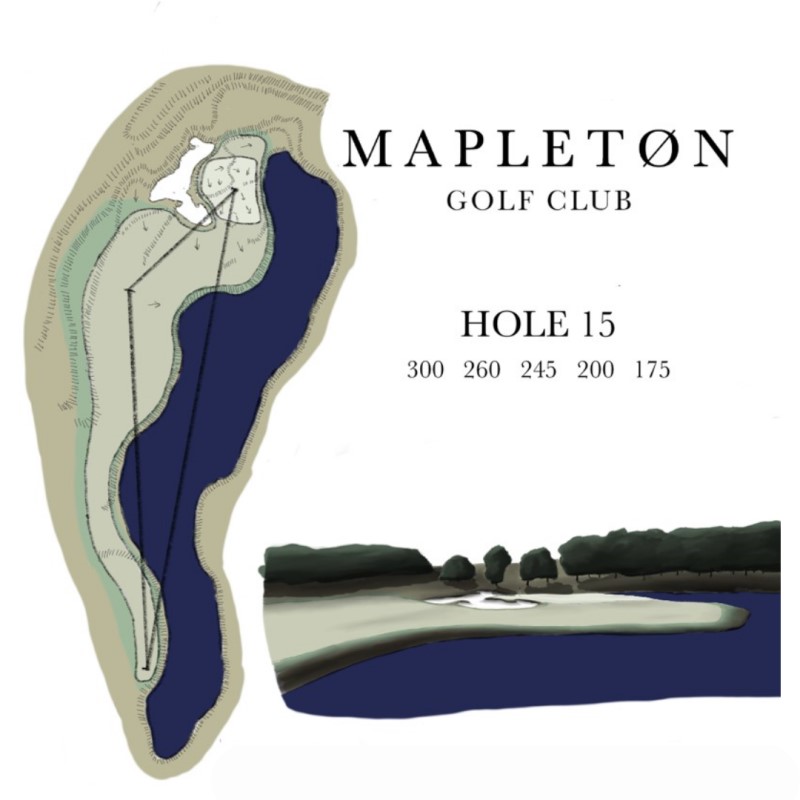
Hole 15
The 15th can be a make-or-break hole in a round or a match. This drivable par 4 is open in front, but trouble threatens both sides. To secure an eagle putt, your drive must carry a corner of the lake. For golfers with less valor, a wide fairway welcomes a layup left. The second shot, a short wedge, should be no problem, right? But the large bunker rests between this approach line and the green – and the lake lurks behind. Adding to the anxiety, the green tilts toward the water, making that wedge a bit more difficult to hold. Good swings will be rewarded at the 15th. But be careful: potential 3s can quickly turn into 6s.

Hole 16
No. 16 begins a memorable closing stretch that meanders north back to the clubhouse. This long par 4 is the most difficult of the trio and the most visually stunning. The tee shot carries a small pond to a large fairway. That’s where it gets tough. The approach is uphill over an enormous escarpment of sand. The pin looks tiny in the context of the features surrounding it, but the target sits in a bowl so good shots will kick towards the center of the green. The safest play is to the right where a fairly easy pitch allows a good chance at saving par. This hole, one of Mapletøn’s best, will test your skill and composure.

Hole 17
There won’t be a par 3 in America quite like Mapletøn’s 17th. Three tee angles at varying elevations. Two greens distinctive in contour and shape. Add the large native bunkers unfurling toward the targets and you have something unique. The longest version of No. 17 is the back left tee to the right green. But even the shortest setup — right tee to right green — is tricky because of the shot angle. The left green has fewer bunkers, but slight roll-offs in all directions put a premium on solid iron play.

Hole 18
Mapletøn’s magnificent closing hole encompasses the best elements of the land: elevation change, mature trees, a dramatic creek and elegant bunkering. It’s a great strategy hole, too. The tee shot plays from a high ridge between two enormous cottonwoods to a plateau fairway.
The closer you play to the right edge – and the creek – the better your chance of reaching this green in two. From the plateau, you’ll enjoy a view of the clubhouse behind the green. In the distance, there’s Old Glory rising above the South Dakota Veterans Cemetery.
The safe layup is left, but this leaves a longer approach over a menacing bunker. More aggressive players will aim farther right. With a trailing south wind, you might see an eagle here. Or make one yourself. Regardless, 18 is the perfect exclamation point on a thrilling round.